I was recently inspired while in Invermere at
Black Star Studios (run by three wonderful ladies) to make books using my old offcuts from printmaking. I have a love of paper. Expensive paper. I printed everything on BFK Reeves, in a beautiful buttercream colour. But I could not bring myself to throw out the scraps that were left afterwards. So I saved them, knowing I would some day use them. That day is here. I am making journals and sketchbooks with this beautiful, fluffy, torn-edged paper I love so much. In the spirit of sharing, I have put together a tutorial. I am by no means an expert, some professional bookbinders would be aghast at the lack of precision in my work....but hey - its handmade!
Well, here we go, today is part one!

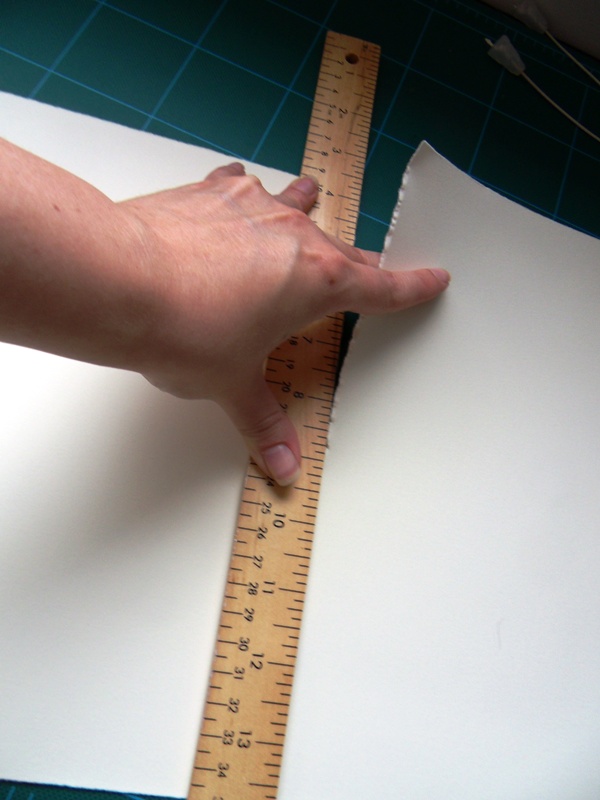
First, I took a piece of paper that was an ungainly 26" x 10" and decided
to transform it into smaller pieces
Then, I grabbed my helper
I marked the paper at 13" (which would eventually mean my book would measure 6.5"
I ripped the paper, rather than cut, to keep the gorgeous rough look that I adore so much.
I did the same to the height, creating a page that was only 5"
Bada-boom-bada-bing, everything is the right size! Kouki got bored and fell asleep, I hope you haven't yet.

I then folded each of the pages in half, lining them up as well as possible.

I then used my fancy dancy tool to help create the crease. I bought it in the book binding section at my art supplies store...but in the past I have used the back of a butter knife and it works just fine.

Now I sorted all of my sheets into magazines (sets of paper) I had 4 pieces per magazine, and I lined them up, one folded on top of the other. This is what they should look like. I made 3 magazines.

I clothespinned the three magazines together to keep them aligned for the next step.

As my magazines are 5" wide and I want to make 4 holes in the paper, I spaced them each 1" apart.

I use a pencil to make the markings before I punch any holes.
Then I took a nail and a hammer to make the holes in each magazine. I just spread the pages open (still stacked!) and hammer the nail through gently. You don't need a large hole, just something big enough for a needle to stick through. There are special tools for this, but in the DIY spirit, a nail and hammer will do. (note: self healing mats are amazing for this!!)
Kouki didn't like all the banging. I guess my helper is gone for the moment. But you just repeat the punching for each magazine.
Now you find yourself a needle and some thread. It is time to stitch these puppies together.
Here is the stitching diagram for the book binding. It will all become clear very soon! This is the hardest (and easiest, once you get the hang of it) part. This is for a full 6 magazine book, but you could use it to make a book that is 100 magazines thick or just 3 (which is what I did.)
So you take the first magazine, tie a big knot in your thread and start at hole 1. The needle goes through to come out at the back.
Then you pull it up through hole number 2, and sink it back down into hole number three.
Pull it back up through hole number 4, and voila, you stitched the first magazine!
Now comes the fun part. Take the next magazine, and line it up with the first. You are going to go from hole 4 to hole 5, this begins the link between the magazines. Just like the previous one, pull the thread back up through hole 6. This is where it changes a bit. Instead of going into the next hole, you go back up into hole number 3 (in the diagram as 7)
Then its up out of hole number 2(8) and back into hole number 9, which is on the second magazine. Remember to keep good tension on the thread for a nice tight bind.
Pull the thread back up through hole number 9 and tie it with the tail of the knot at the start. You have sewn two magazines together now!
Now - it is lather, rinse repeat for as many magazines as you want. Just keep following the diagram. You tie off each end before moving on to the next magazine by looping the thread around the previous magazines binding (in this case, the one between hole numbers 5 and 6.)
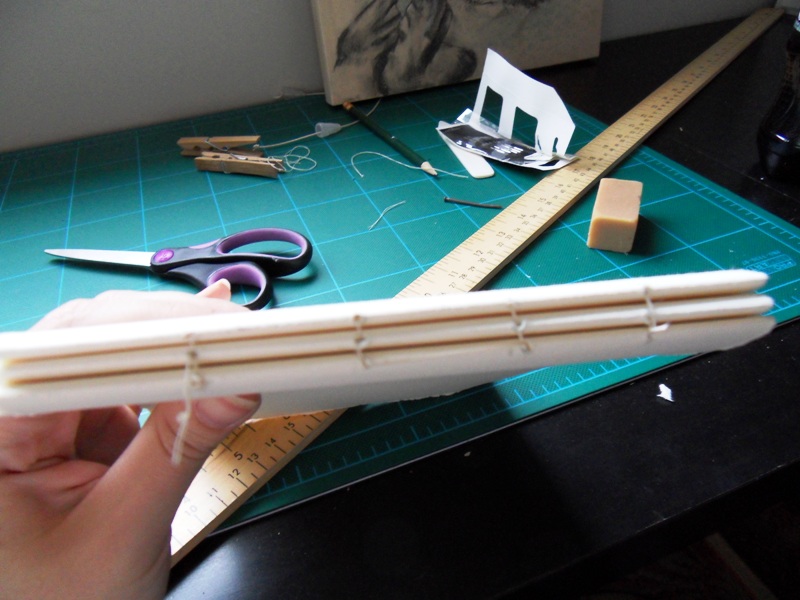
Once you are done, retie the knot a few times around before you snip the ends, this helps hold everything together.
Et voila! You have sewn yourself a book! Isn't that exciting? Now for a little bit of reinforcement
I normally use PL-400 or one of the LePage heavy grade adhesives for binding - just because it will have the wiggle room and durability that a well used book needs. However - it stinks to all high heaven, so you need to do it in a really well ventilated area. My kitty returned and I didn't have any, so rubber cement worked in its place.
Smear it over the binding, trying to make as little of a goopy mess as possible.

Then, bulldog clip it and let it dry. After this we are on to the "making the cover" stage....but until I decide what the cover will be, that will have to be in the second installment!
I would love to hear what you think, if I should do more of these, if you want to make one and pretty much any feedback you might have for me! Until I post again....
Love and Kisses,
xoxo


 I then folded each of the pages in half, lining them up as well as possible.
 I then used my fancy dancy tool to help create the crease. I bought it in the book binding section at my art supplies store...but in the past I have used the back of a butter knife and it works just fine.
 Now I sorted all of my sheets into magazines (sets of paper) I had 4 pieces per magazine, and I lined them up, one folded on top of the other. This is what they should look like. I made 3 magazines.
 I clothespinned the three magazines together to keep them aligned for the next step.
 As my magazines are 5" wide and I want to make 4 holes in the paper, I spaced them each 1" apart.
  I use a pencil to make the markings before I punch any holes.


No comments:
Post a Comment